First of all create a new file by hitting CTRL + N or by
getting inside the file menu and clicking the option New.
As soon as you will select that tool the
pointer of your mouse will assume the shape of a
down arrow and at the top of the Photoshop window right
beneath the menu bar will be appeared
type tool options. The next thing which is supposed to be done right
after that is the setting of
Type Tool
options.
 |
| Type tool options :Font family, font style, font size,anti-aliasing method, alignment and color |
Set the
Font Family (e.g. Georgia, Impact etc),
Font
Style (Bold, Italic, Regular or Bold-Italic etc),
Font Size (you can select your required font size out of the
drop-down menu but in case your required font size is not available in the menu,
there is no need to worry about that, just select and delete the value which is present in the font-size box, and type your required size in the
same box and press enter to select it for your text.). Then select
anti aliasing
method (strong, crisp, sharp or smooth.),
alignment (right, left or center), and the color for your text. Having done your required setting , put the
pointer of your mouse on the page and click the left button of it once. As soon
as you will do so , you will notice that in the layer palette a new layer will
be appeared all by itself with the prominent letter ‘T’ on it and cursor will start to blink on
the page.
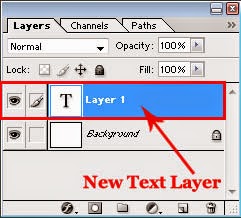 |
| Text layer |
Then type a few words on it.
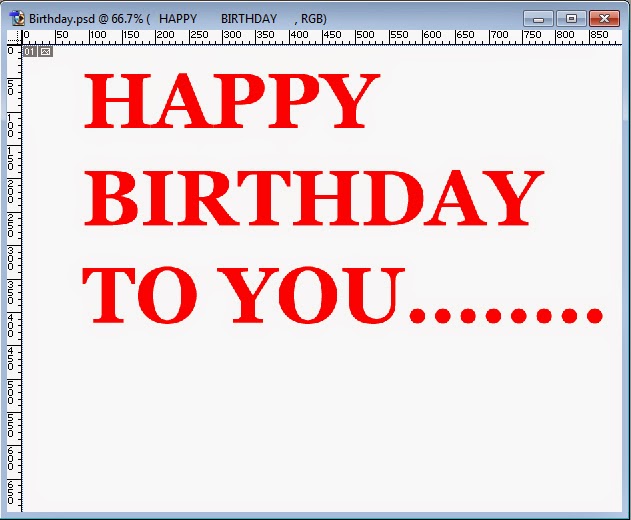 |
| Typed words on transparent text layer |
Having done so , open a picture by getting
inside the file menu and selecting the option
Open
or by hitting CTRL + O.Then select the newly opened image by hitting CTRL + A, copy it by hitting CTRL + C and then paste it on the file on
which you have typed the text by hitting CTRL + V. Instead of copying and pasting, you can drag and drop the same image on the file on which you have typed the text using
Move Tool as I have explained earlier in my post
How to change a picture's background ?
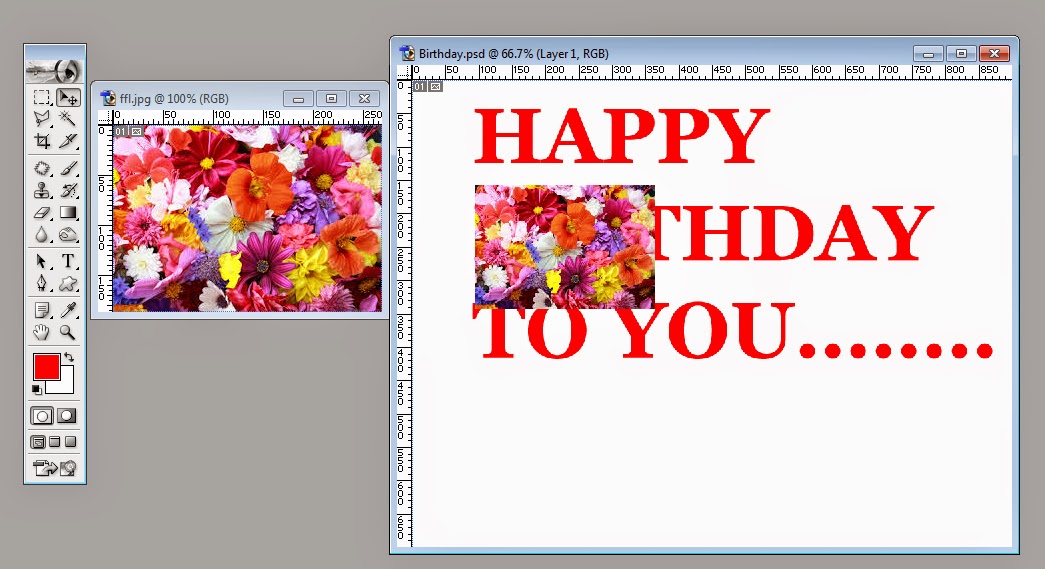 |
| Image on the text |
Well after dragging and dropping, or after copying
and pasting you will notice another layer in the layer palette containing the image you have recently dragged and
dropped or copied and pasted .
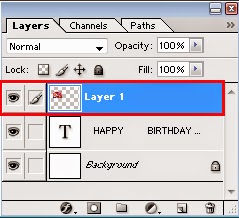 |
| Three layers are visible in the layer palette |
Then select the layer that contain the image by clicking
on it and in order to enlarge the layer or image, get inside the
Edit Menu and select
the option
Free Transform or hit CTRL +
T. .
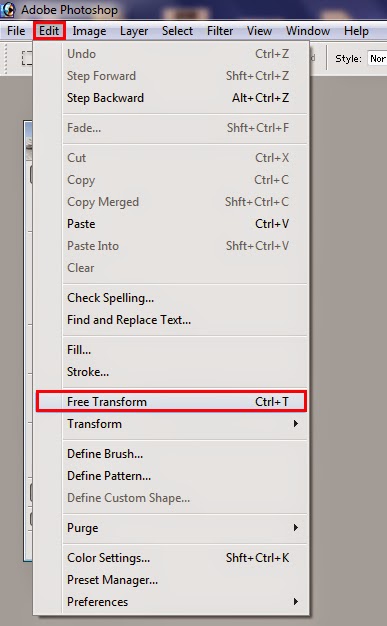 |
| Edit Menu : Contains many options including Free Transform |
As soon as you will select that option, a rectangle will be appeared
around the image that is usually referred as
Free Transformation Rectangle, that means that, the layer that
contains the picture is ready to be transformed. Then enlarge that image by
putting the pointer of your mouse at any point of the
Transformation Rectangle
and dragging it out.
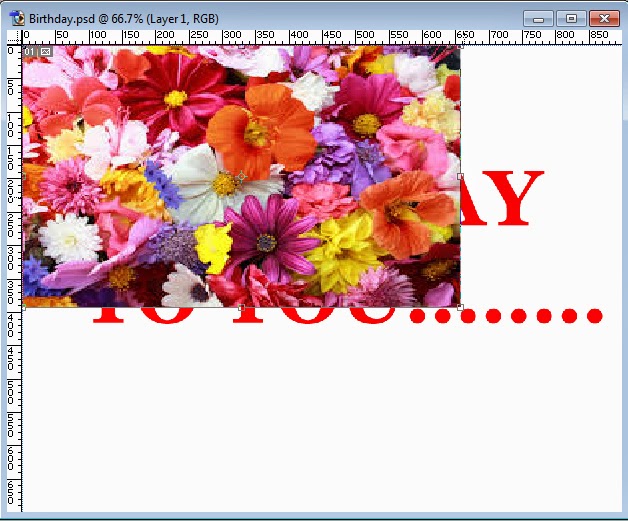 |
| Image :During enlargement |
When the layer that contain the picture cover the layer
that contain the text totally, stop
dragging.
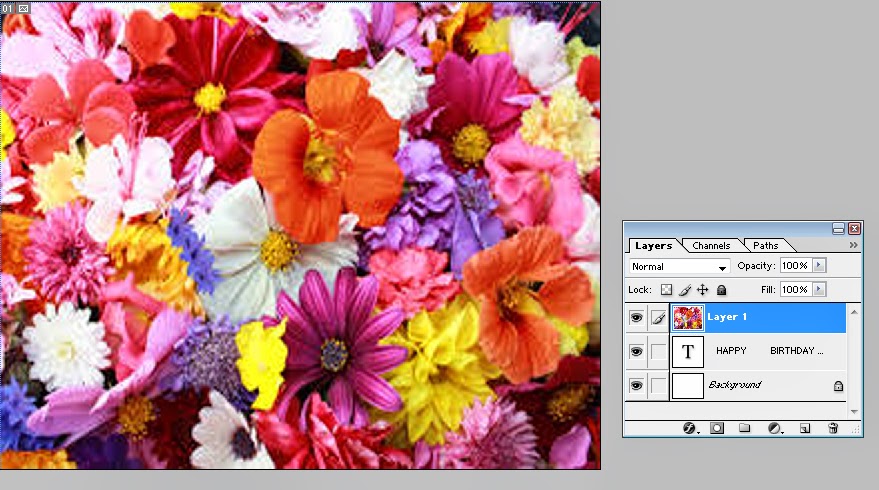 |
| Text layer is hidden behind the image |
Then make a group of both layers (text and image layers) by
getting inside the
Layer Menu and
selecting the option
Group with previous or
by hitting CTRL +G.
 |
| Group with previous : In the layer menu |
As soon as you will select that option or hit those keys ,
the layer that contain the text will be reappeared and the layer that contain
the image will clearly be seen nowhere else but inside the text.
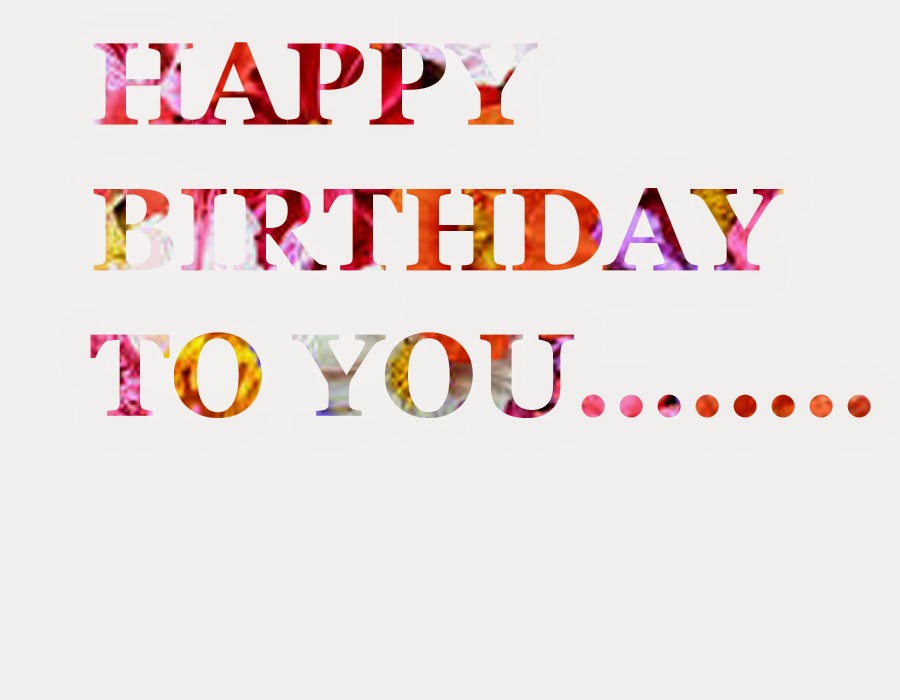 |
| After being grouped with previous: Image layer inside the text |
The next thing you need to do
is to merge both layers. To do so first of all you need to make a link between
both layers. In order to make a link between the two layers all you need to do is to
select one layer out of both and then click the small empty box that can be seen between each layer and the eye
symbol that indicates the layer visibility in the layer palette.
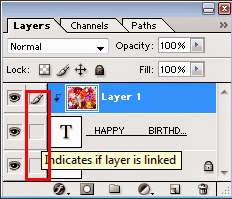 |
| Small boxes beside layers indicate if layers are linked |
These small
boxes basically indicate whether the layers are linked or not. If these boxes are empty, it's mean that the layers are not linked. As soon as you will click the empty box beside the text layer, a small clip
like symbol will be appeared in that box that will indicate that the layer has
been linked with the selected layer.
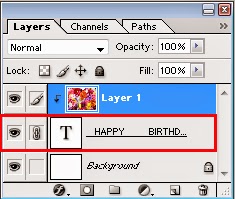 |
| Locked background layer is not linked with the two other layers |
After making the link between the both layers,
get inside the
Layer Menu again and
select the option Merge Linked or hit
CTRL + E.
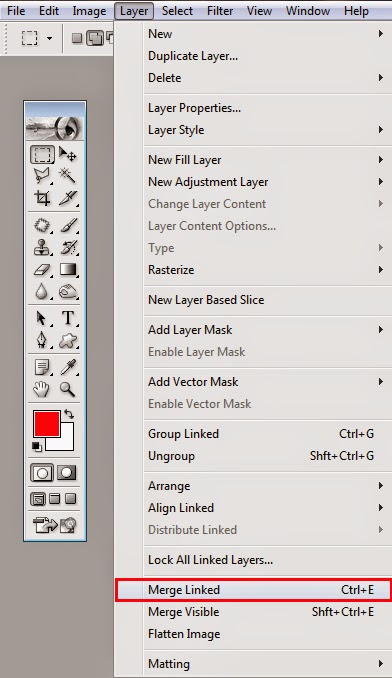 |
| Merge Linked: In Layer menu |
As soon as you will select that option both layer will be merged with
each other and become one layer. Then in order to make the text prominent, add
another layer by clicking the small icon that can be seen beneath the layer
window.
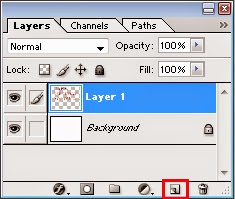 |
| Small icons beneath the layer window are used to perform many funtions |
As soon as you will click that icon , a new empty layer will be appeared in
the layer palette. Then out of the tool window click either background of
foreground color to open
Color Picker
window.
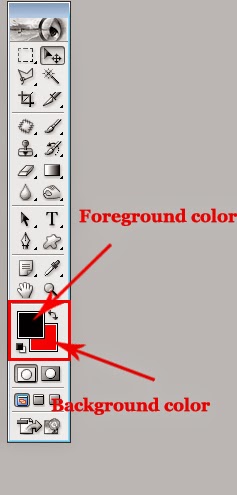 |
| Background and Foreground colors |
As soon as you will click either background or foreground color, in
both cases will be opened
Color Picker
Window.
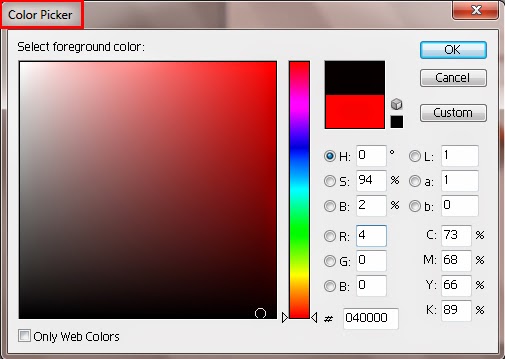 |
| Color Picker : Select any color of your choice |
Out of that window select any color of your choice by clicking on it and then click OK.
With that click
Color Picker window will get out of sight leaving the
background or foreground color you have selected in the box of background or foreground color. Then in order to fill your
recently selected color in the empty layer, which is to be used as text background, you are supposed to hit either CTRL
+ backspace key ( in case you want to fill background color in the layer) or
hit ALT + backspace key (in case you want to fill foreground color in the
layer). In my case that is foreground color so I filled it in the layer by
hitting ALT + backspace key. As soon as you will hit those keys, color will be
filled in the layer and the layer that contains the text will be hidden behind
that layer.
 |
| Text layer has been hidden because the top most layer is no longer transparent |
In order to bring the text layer forward, first of all select that
layer by clicking on it then get inside the Layer menu and select the option
Arrange. As soon as you will select the option
Arrange, it s own side menu will be appeared. Out of that side menu, select the option
Bring to front .
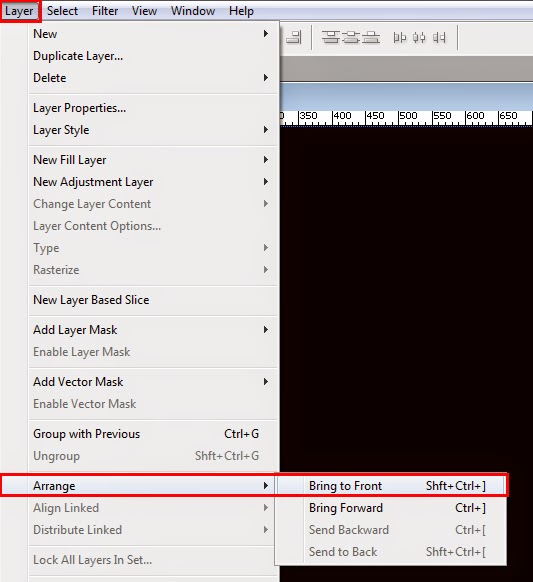 |
| Text layer needs to be brought to front to be revealed. |
As soon as you will select the option the text layer will move to front and the lay with filled color will become the background of it.
 |
| Simple but attractive text style |
If you find this post useful, kindly don't forget to subscribe your comments.


0 comments:
Post a Comment