Once I needed a few passport size photographs which were
supposed to be submitted with my admission form. For that purpose, I had to go
to a nearby photo studio, but after approaching there, I had to wait for almost
half an hour because photographer cum owner of the studio was engaged in a deep
conversation with an elderly couple. Though, I didn't listen intently, but
all the same, I couldn't refrain from listening their conversation. Old gentleman had recently had his photograph
developed from the same studio and was continually insisting that there were not as
much curls in his hair as were appeared
in the photograph, while the photographer kept on insisting that it was not his
fault. They argued and argued and at last, photographer couldn't stand against the angry old gentleman and promised to do
something for his hair style to look better in the photograph.
As a matter of fact, it is to make required changes in hair
style is not a bit difficult by the use of Adobe Photoshop and as far as
removal of curls out of hair is concerned, it can be done quite easily if you
know how to use filter called Liquify and the tool called Burn Tool properly.
In order to remove curls and make hair straight and shiny, first of all, open a picture of a
person with prominently curly hair either by
hitting CTRL + O or by getting inside
the File Menu and clicking Open.
This window has no menu bar at the top but it’s own tool bar
that can be seen at the left side of it. Out of that tool bar select the option
Freeze Tool or hit F.
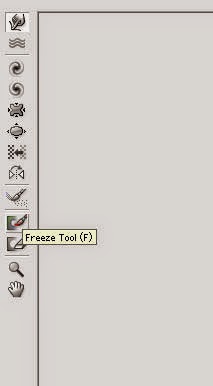 |
| Freeze Tool : Saves parts of picture on which you don't want to apply the filter called Liquify |
Freeze Tool
As soon as that
option will be selected the pointer of your mouse will assumed the shape of a
circle that is called
brush. Then put
the pointer of your mouse at the picture keep it's left button pressed, and drag it.
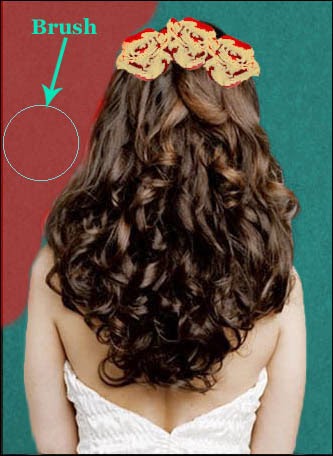 |
| Red color indicate the part on which freeze tool has been applied |
Part of the picture on which
you will drag your mouse after the selection of Freeze Tool, will be covered by red or some other
color depends on the color which is selected in the
menu called
Freeze Color (This
menu can be seen at the right side of the Liquefy window).
 |
| freeze color doesn't make any difference |
Leaving the hair,
drag your mouse all over the picture. The part of the picture on which
you will apply freeze tool will get totally frozen and no tool will work on
that part of the picture so it will remain perfectly intact no matter what
liquify tool you will apply on hair.
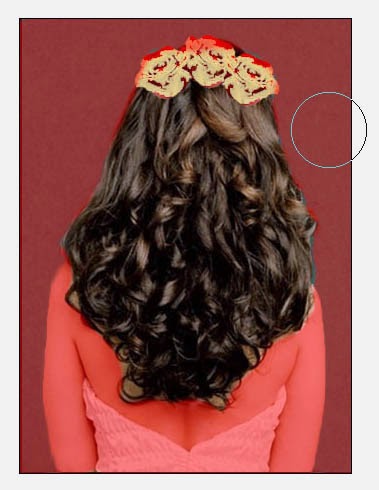 |
| Save from hair, freeze tool has been applied all over the image |
Warp Tool
Then select the option called
Warp Tool out of the tool bar window.
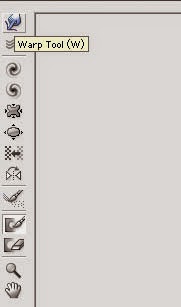 |
| Warp Tool works on a picture as though it is made up of a liquid |
Set the size of the brush of this tool according to the size of the picture you
want to work on, and pressure of it equals to 20.
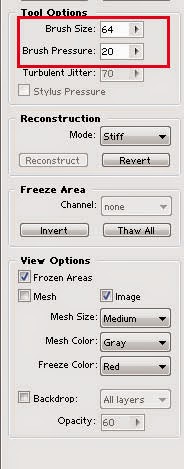 |
| Tool Options can be seen usually at the right side of the window |
Then put the circle shaped
pointer of your mouse at the top of the head, keep the left button of your
mouse pressed and drag it downward.
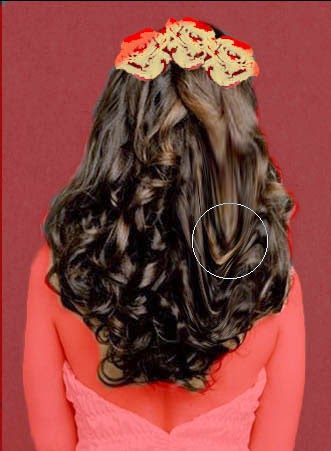 |
| Hair is being straighten with each mouse drag |
Repeat the same action again and again and
after a few mouse drags the difference will be clearly visible.
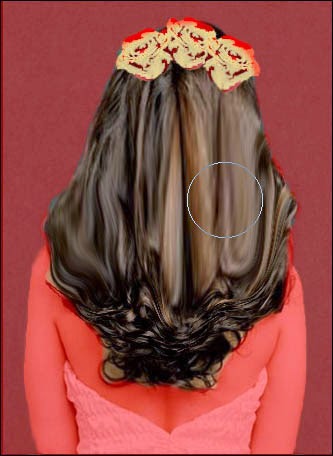 |
| Image : After a few mouse drags |
After complete straightening , put the pointer of
your mouse at the bottom of the hair and set it cautiously,to give it a natural look. After that click OK.
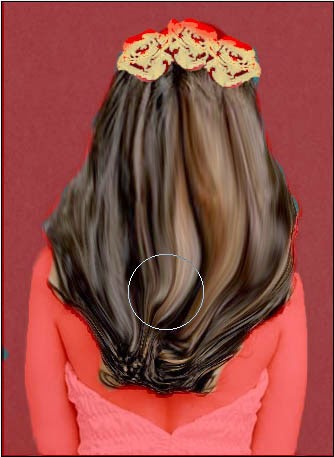 |
| Image: After complete removal of curls |
As soon as you will click OK, Liquify window will be closed and you will have
your picture with a different hair style opened in the Photoshop window. After
the use of the filter Liquify, you will get
perfectly straight hair but not as real as it looked before straightening.
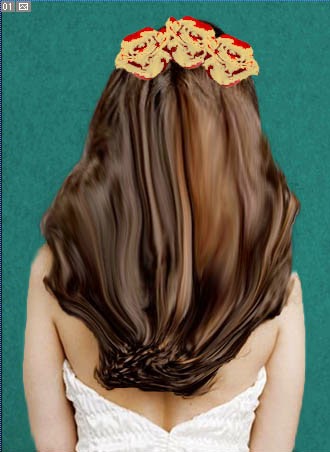 |
| Hair : Unnatural look |
Burn Tool
To resolve this issue and to give it a natural
look select
Burn Tool out of the tool window.
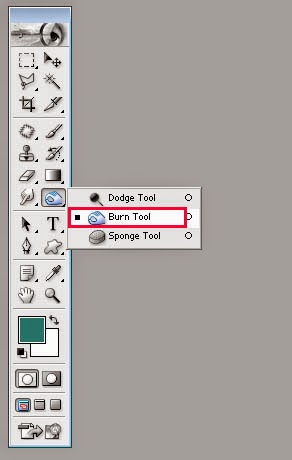 |
| Burn tool: very important tool used for image re-touching |
Then zoom the picture in by
hitting CTRL + +. Set the size of the brush according to the size of the
picture by hitting
} (to increase the size of the brush) or
{ (to
decrease the size of the brush). After
setting it’s size, put the brush (circle shaped pointer) on the hair, keep the
left button of your mouse pressed and drag it all over the hair. With each
drag, color of the hair will get darker and it’s unnatural shining will be
dimmed. Keep dragging your mouse till
the complete removal of unnatural shine out of the hair.
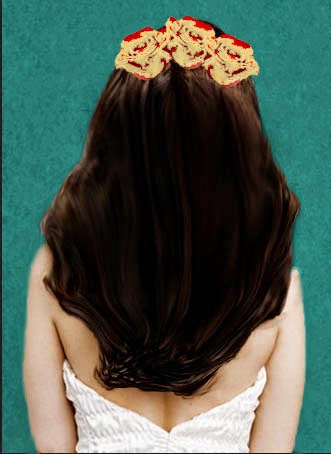 |
| Image: After removal of unnatural shine |
Save As
Then save the picture
in your required format by getting inside the File Menu and selecting the
option
Save As.
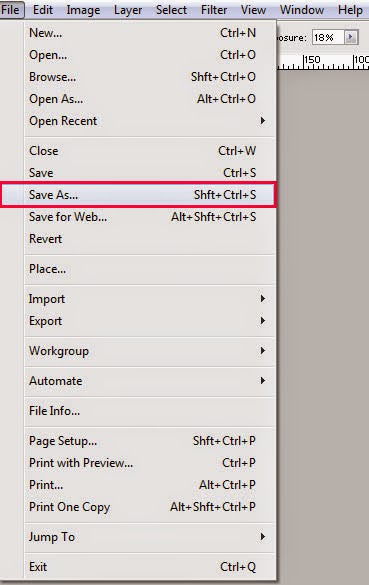 |
| Save As: Save your image in any format |
As soon as you will
select the option
save as out of
file menu a window called
Save As will be opened.
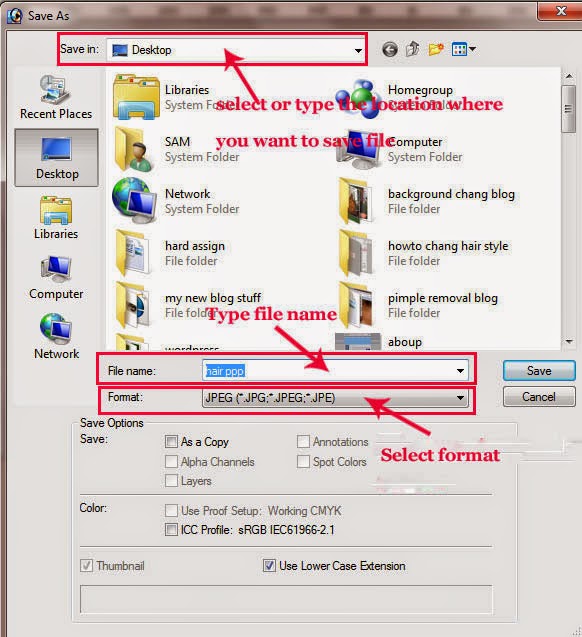 |
| Select location and format for your image |
In that window,
select the location e.g. dive or folder in which you want to save your file in the box called
Save in, that can be seen at the top of the window, type the
name of your file in the box called
File name and select the format that is
required for your newly edited image in the
Format box and click
save. After that click, task will be accomplished and the image will be
ready for use wherever you want.
Kindly don’t forget to subscribe your comments
and share your opinion regarding this post.


0 comments:
Post a Comment