It is to draw a perfect
sketch of any person or object by hand has always been considered a great art. But whenever
we look around, such sort of artists are very rarely found. But we can see
such sketches in books and newspapers almost everyday . These sketches
might be real and drawn by real artists with art on their finger tips but at
the same time they might not. As it has long since been possible to convert a
photograph whether it be a colored one or a black and white, into a sketch that
seems perfectly hand-drawn, news papers and other publishing companies have
stopped bothering themselves finding such artists. Though there are many other
photo-editors which are used to convert a photograph into a sketch or
line-drawing, but the most popular and easy to use is none other than Adobe
Photoshop.
In order to turn a picture into a line
drawing or a sketch, first of all open a picture in Adobe Photoshop by hitting CTRL + O or
by getting inside the File Menu and clicking Open.
As soon as you will do that, a small window
will be appeared at the right side of your Photoshop window. In that window,
the option Layers will be selected by default. Further the picture you have opened to work
at, will clearly be visible in that window as locked-background.
How to unlock a locked layer?
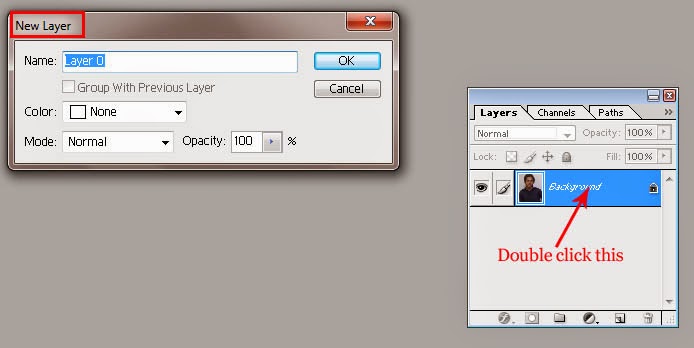
The next thing you are supposed to do is to unlock the locked layer. For that purpose, put the pointer
of your mouse on the Background (layer which contains the picture you have recently
opened to turn into a line drawing) and press the left button of your mouse
twice. As soon as you will perform that action, a small window will be appeared
called
New Layer.
 |
| New Layer: Type the name for unlocked layer and set mode and opacity |
In that window there will be seen two boxes including
Name and
Group
with previous. Type the name of the layer in the name box while do nothing with
the second option that is
Group with previous (that option will not be active
in this case because we have not created any layer previously). Apart from these two
boxes, the
New Layer window contains three more options.These are called
Color,
Mode and Opacity.
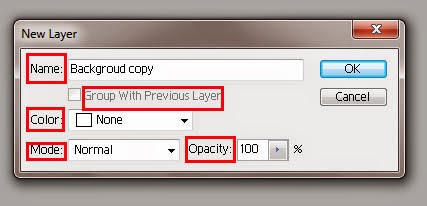 |
| Color setting in New Layer window is not necessary |
Set the
Opacity of the layer upto 100% and out of the
Mode Menu
select
Normal. As far as the menu called
Color is concerned, if you select red or
green or blue or white or totally ignore that menu, it will not make any
difference at all. After necessary setting, click OK. As soon as you will click
OK the
New Layer window will disappear and the name of the layer will be
changed from 'Background' to the one you have typed in the New Layer window’s name
box, and the picture of lock will
disappear out of the layer, meaning, layer will be unlocked and freely movable .
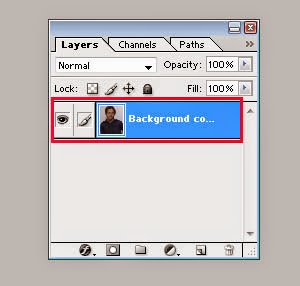 |
| Layer name has been change from Background to Background copy |
How to create a duplicate layer?
Then put the pointer again on that unlocked layer and hit the right button of
your mouse once. With that right click a menu will be appeared, out of that
menu select the option
Duplicate Layer.
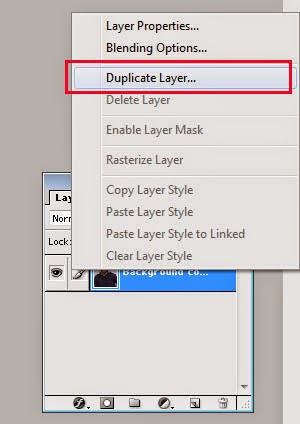 |
| Select the option Duplicate layer to open Duplicate Layer Window |
As soon as you will select that option
, another window will be appeared called
Duplicate Layer.
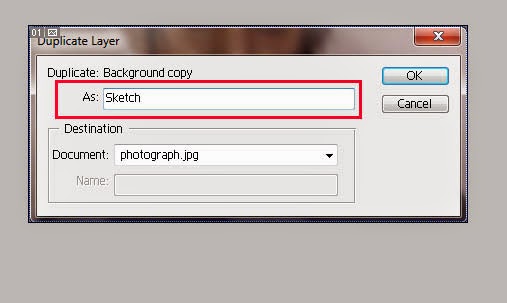 |
| Duplicate of Background copy is about to be made |
In that window type
the name of the duplicate layer in the box called
As. While there is no need to
set the
Destination of the duplicate layer, so you can leisurely ignore it.
After that click OK and you will find the two identical layers with different
names (depends on what names you have given those layers) in the layer window.
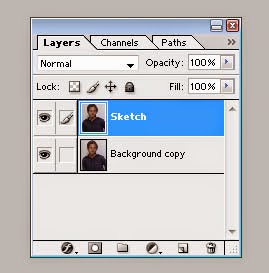 |
| Background copy and Sketch :Two identical layers |
How to select Blending Mode?
Select the top-most layer out of both and then select the blending mode called
Color
Dodge out of the drop-down menu that can be seen right beneath the word layers
in the layer window.
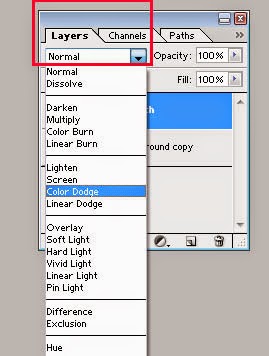 |
| Drop-down Menu: Contains many blending modes |
As soon as you will select that color mode, there will be
seen a few but obvious changes in the picture’s color scheme.
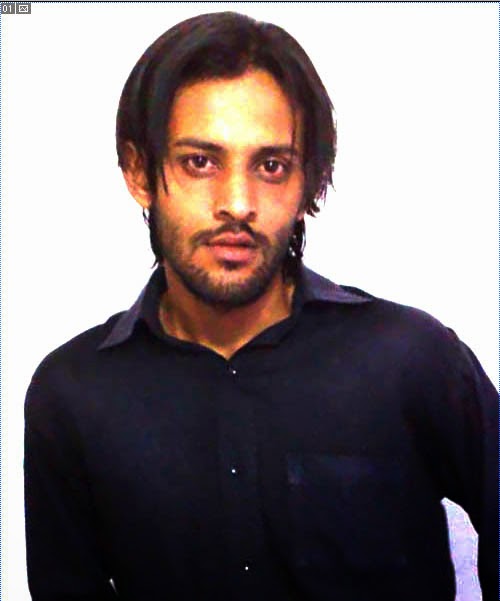 |
| Image: After the selection of blending mode called Color Dodge |
Invert (CTRL + I)
After that, hit
CTRL + I. As soon as you will hit the keys , picture will be vanished
totally and all you will see, will be nothing but a blank page.
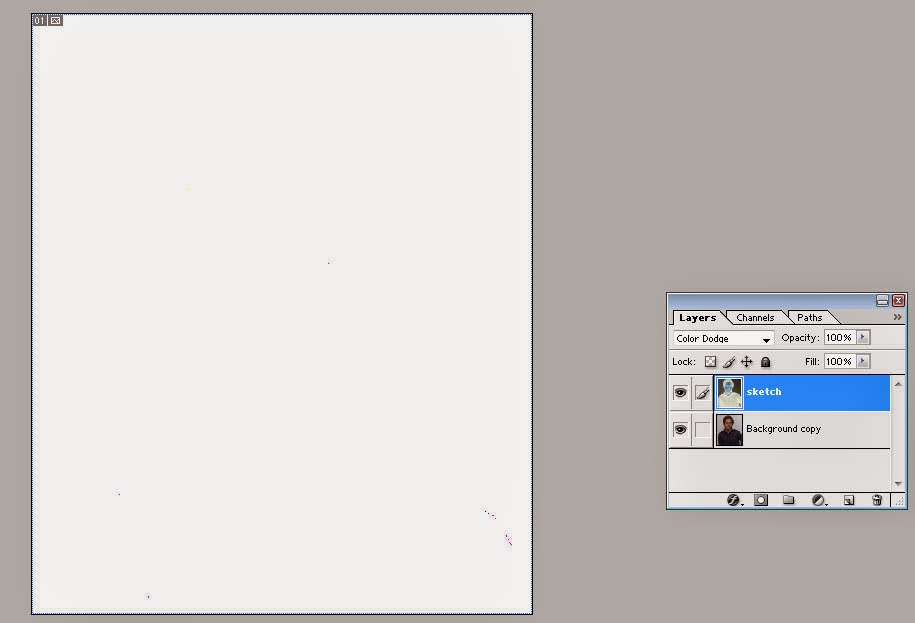 |
| Image: After being inverted |
Gaussian Blur
Then get inside
the filter menu, select the option
Blur and out of the submenu of
Blur select
the option
Gaussian Blur.
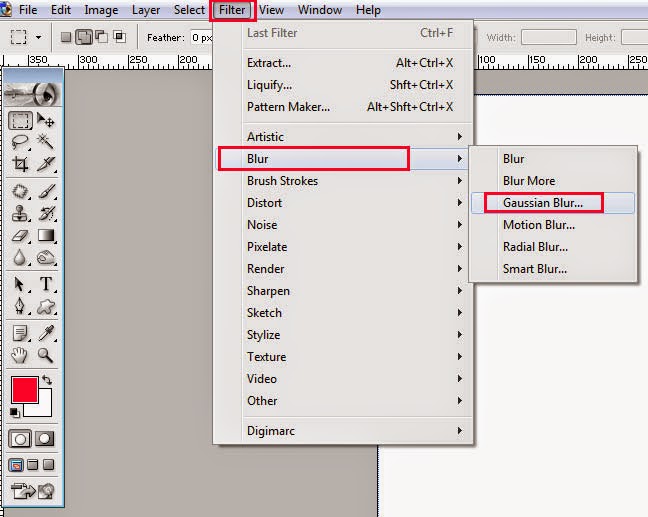 |
| Selection of filter out of the filter menu |
As soon as you
will select that option, picture will be reappeared on the page along with a
window called
Gaussian Blur. Here at this point picture will look more like a
hand-drawn sketch than a photograph, but your work will not be accomplished at
that point.
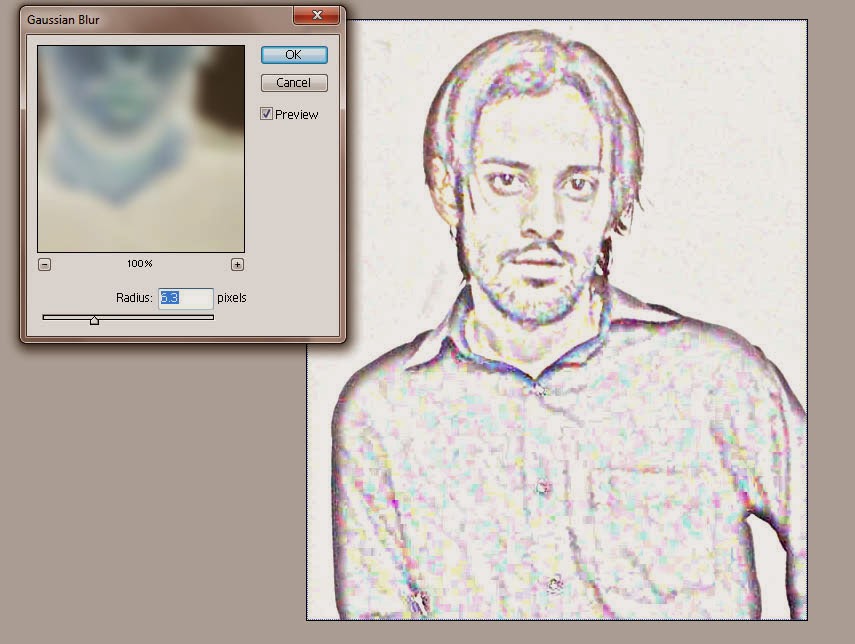 |
| Work nearly accomplished |
In the window that is referred as
Gaussian Blur you are supposed to set the
Radius of the
Blur.
Before starting, put check in the check box right beside the
word
Preview in the
Gaussian Blur window. Then set the radius of the blur to
set required details in the picture.
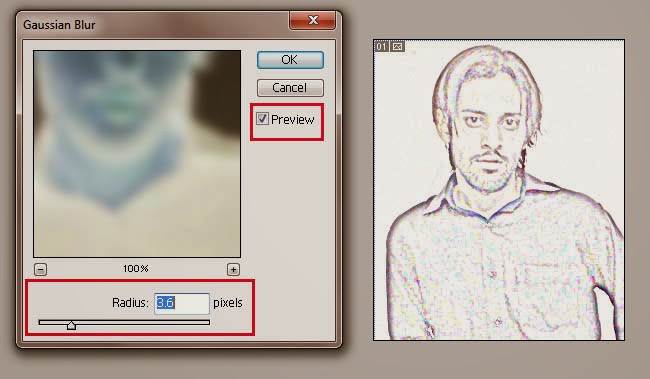 |
| Radius :Show as much details in the sketch as you want |
If you set more radius your picture will
show more details and if you set less
radius your picture will show less details after being transformed into a
sketch. After the setting of required radius, click OK and with that click the
window called
Gaussian Blur will be
disappeared.
Saturation
The last thing you are supposed to do to accomplish the task is to
click the tiny icon that can be seen right beneath the layer window called
Create
new fill or adjustment layer.
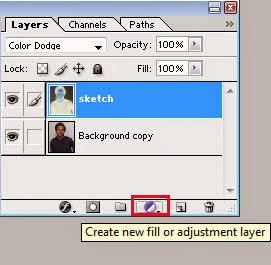 |
| That tiny icon will open a new window |
As soon as you will click that icon, a menu will
be appeared and out of that menu select the option
Hue and Saturation.
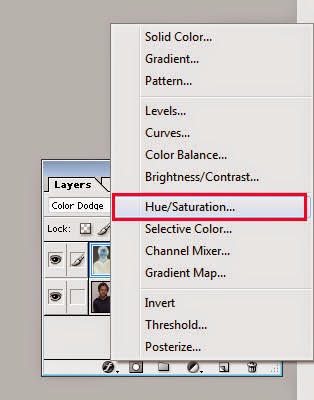 |
| Menu : That contains many options to manipulate the image look |
After
the selection of that option, within an instant, another small window will be
appeared called
Hue/Saturation. In that window ,you will see three options
these are:
Hue,
Saturation, and
Lightness.
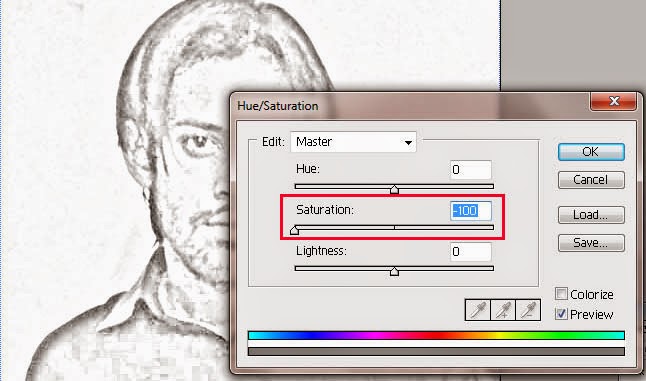 |
| There is no need to set Hue and Lightness |
Out of these three options, you are
not supposed to make any change in
Hue and
Lightness. The only change you are
supposed to make is in
Saturation. Set the saturation of the layer equals to
-100 and click OK. With that click you
will notice that the picture has lost all it’s photographic qualities and has
assumed the form of a hand-drawn sketch.
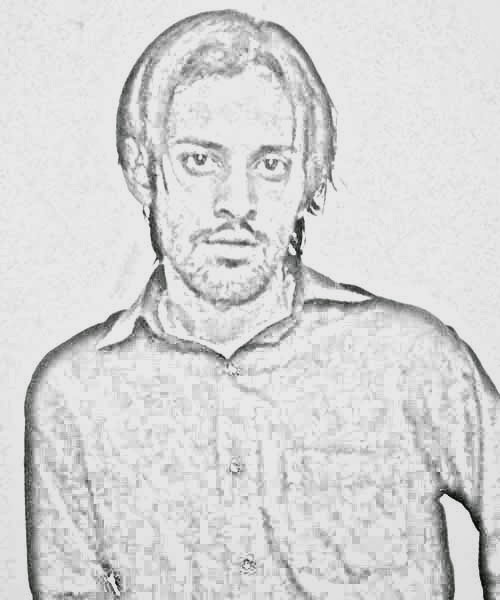 |
| Image : After complete editing |
Save the image in your required format
by getting inside the file menu and selecting the option
Save As or hitting the
keys CTRL+ SHFT + S.
I hope
you will find this post useful. If so, please don’t forget to subscribe your
comment.


0 comments:
Post a Comment