Invert is a command that is not very commonly used in
Photoshop. In order to understand the functionality of Invert in Photoshop it
is necessary to understand the three different sectors in which any image is
considered to be divided. These sectors
are referred as Shadows, Highlights and Midtones. Whenever we cast a glance over a picture we notice some
parts of it noticeably darker than the rest. All such part are fell into the
category of Shadows. Some parts of
the same image shows very light shades of different colors which seems almost
equivalent to white, all such parts are referred as Highlights. While all the parts of the image containing different
shades between the lightest and the darkest shades are referred as Midtones. For instance in the image given below you can
see my favorite actress Resham in her fancy white outfit.
 |
| Clear representation of Highlights, Shadows and Midtones |
In this image Shadows , Highlights and
Midtones all are quite obvious and
easily noticeable. You can consider her hair as Shadows, her dress as
Highlights and her skin and background as Midtones in the image.
Invert is used only when you want to convert the
darkest parts of the image into the brightest parts (transform Shadows into
Highlights) or if you want to convert the brightest parts of image into the
darkest parts (transform Highlights into the Shadows) and at the same time
reset the Midtones accordingly. Further, while working with RGB color mode, you
notice that the
Invert command transform different shades of green into
different shades of magenta, different shades of red into different shades of
cyan and different shades of blue into different shades of yellow, and so it does
with the other color modes.
How to apply Invert command?
In order to understand how this command works
follow the steps given below:
First of all open a
picture in Photoshop preferably with the extension JPEG, either by getting inside the
File Menu and selecting the option named
Open or by hitting
CTRL + O on
the keyboard.
 |
| Image before being inverted |
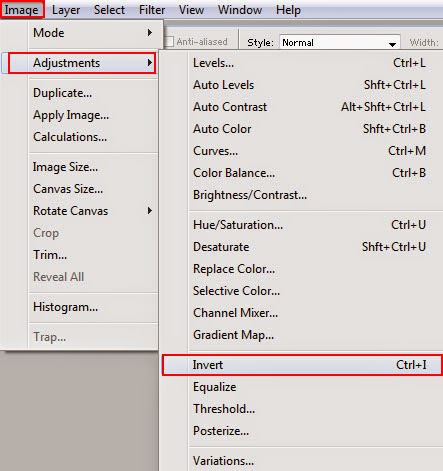
Having opened the image
in Photoshop, select the image tab in the menu bar by clicking on it. As
soon as you will click the tab named
Image, there will be appeared a menu
containing various options. Out of those options select none other than
Adjustment. As soon as you will select the option named
Adjustment , there will be appeared it’s side menu containing different
sub-option. Out of those sub options, select
Invert either by clicking on it in the menu or by hitting
CTRL + I on the keyboard.
 |
| Command referred as Invert given inside the sub menu of Adjustment |
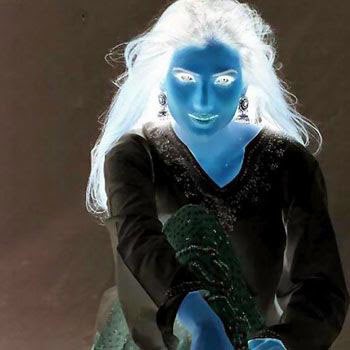
As soon as
you will select the option named
Invert, the Shadows (darkest parts in the
image) will be transformed into Highlights (brightest parts) and the Highlights
will be transformed into Shadows. Further, Midtones too, will changed
themselves accordingly, meaning darker parts of the image will turn less darker
while the brighter parts of the image will turn less brighter and the image
will assume the aspect of a photographic negative according to the picture
below.
 |
| Under the impacts of Invert image assumes the features of photographic negatives |
As I have explained earlier that the Invert command transforms the different shades of red into
different shades of cyan, you can observe the transformation of the red component which was obvious in the skin of the actress, into cyan in the image given above.
In order to observe the impacts of
Invert on different
colors you can apply that command on any image containing a number of colors
for instance the image given below.
 |
| Image containing Red, Green, Blue and Cyan, Magenta, Yellow |
As soon as you will apply the command named Invert on the image given
above, the same image will be transformed into the image given below.
 |
| Impacts of the command named Invert on the different colors |
As in this image there were no noticeable highlights and shadows before inversion and all the color shades had the same intensity so there is nothing look like a photographic negative in this image after inversion.
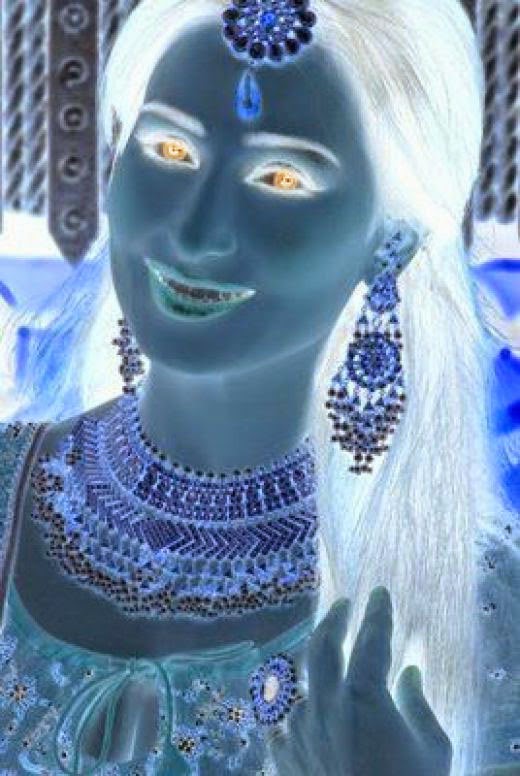
As you can transform a colorful image
into something look like a photographic negative by applying
Invert command on it, you
can convert a photographic negative into a colorful image by inverting its
features too. For instance the following image can be transformed into a perfect colorful photograph if you apply
Invert command on it.
 |
| Image ready to be transformed into a perfect colorful photograph |
 |
| After applying Invert command |
I am certain, this tutorial will be proved helpful to all my readers. In order to put forward any question, complain or suggestion for further improvement, kindly don't forget to subscribe your comments.


1 comments:
Great Article
Image Processing Projects
Deep Learning Projects for Final Year
JavaScript Training in Chennai
JavaScript
Training in Chennai
The Angular Training covers a wide range of topics including Components, Angular Directives, Angular Services, Pipes, security fundamentals,
Routing, and Angular programmability. The new Angular TRaining will lay the foundation you need to specialise in Single Page Application developer.
Angular Training
Post a Comment