As soon as I selected that option, a window opened. In that window's Look in bar, I typed the word 'desktop' because my image folder was exist on desktop .
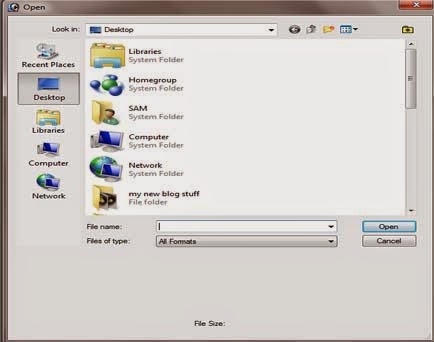 |
| Open window: Select the folder or file you want to open |
As soon as I typed the word
desktop in the bar, all desktop items appeared in the window. I selected my required folder and clicked the button called
Open .
Zoom in (CTRL + +)
As soon as I clicked that button all the photos that folder contained appeared in the window in an instant. I selected one and clicked
Open again and the photo was opened in
Photoshop. I zoomed the picture in by hitting CTRL + + ( a picture can be zoomed out by hitting CTRL + -).
Window Menu
After that , out of the menu bar of adobe Photoshop 7.0, I selected the
window menu. Out of the sub-menu of the window menu, I put check beside the option
Tools. As soon as I put check beside that option, a tool bar appeared at the left side of the Photoshop window.
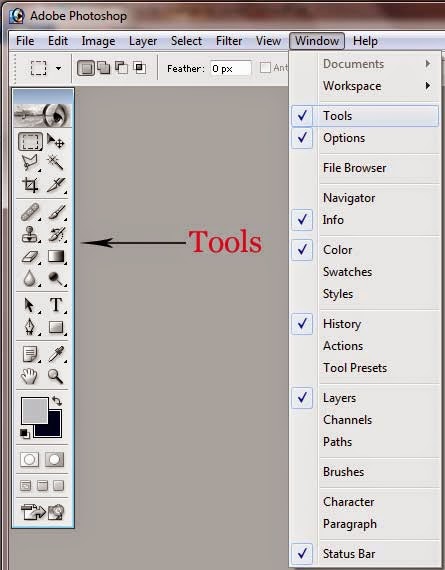 |
| Window menu : Opens all closed window |
Lasso Tool
Out of those tools I selected
Lasso Tool by clicking on it.
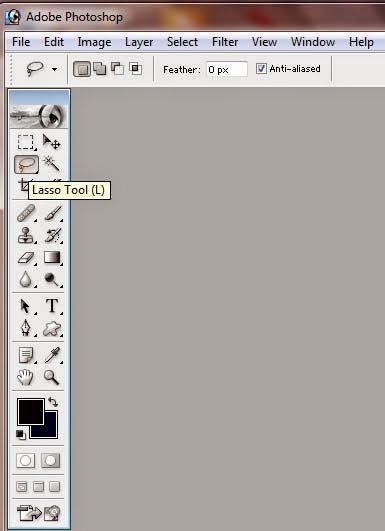 |
| Lasso Tool : Used to make selection |
When I put the pointer of my mouse at the arrow that could be seen at the bottom- right of the option
Lasso Tool and clicked the left button of my mouse, the sub-menu of
Lasso Tool appeared.
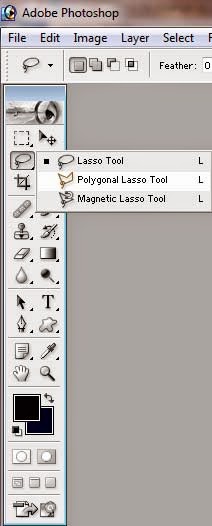 |
| Types of lasso tool: All are used to make selection but in slightly different way |
Polygonal Lasso Tool and Add to Selection
Out of that menu, I selected
Polygonal Lasso Tool.Out of the top options, I selected
Add to Selection ( we select
Add to Selection only when we want to make selection of more than one objects at the same time).Then I made selection of both eyes at the same time .
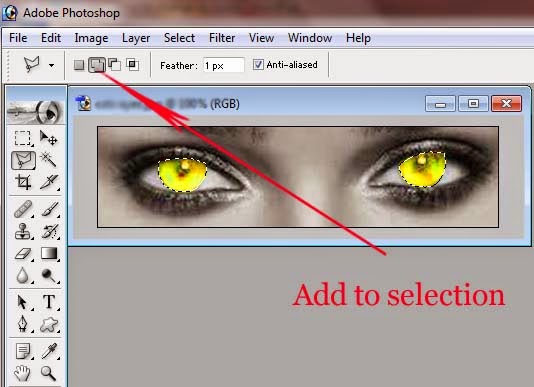 |
| Add to selection: Make selection of more than one object simultaneously |
Hue and Saturation Dialogue Box
After that I hit the keys CTRL + U. As soon as I did so, appeared the
Hue and Saturation dialogue box. I put checks beside
Preview and Colorize then set
hue ,
saturation and
lightness according to my wish then clicked OK.
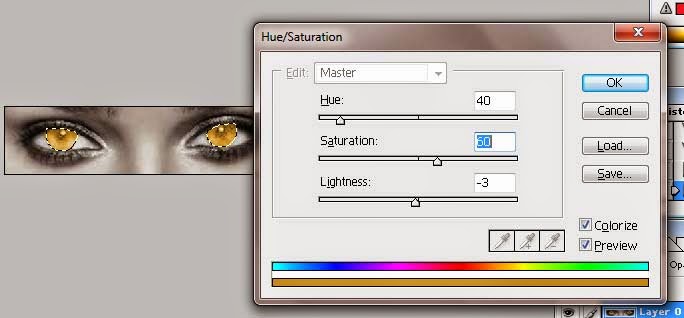 |
| Slides representing Hue, Saturation and Lightness |
Removal of Selection (CTRL + D)
As soon as I clicked OK, the eye color totally changed and the bad effects were removed totally. To remove selection, I hit CTRL + D and the selection removed.
Save As
To save the edited image I clicked the
file menu again and selected the option
save as. As soon as I selected that option a window called
save as opened.
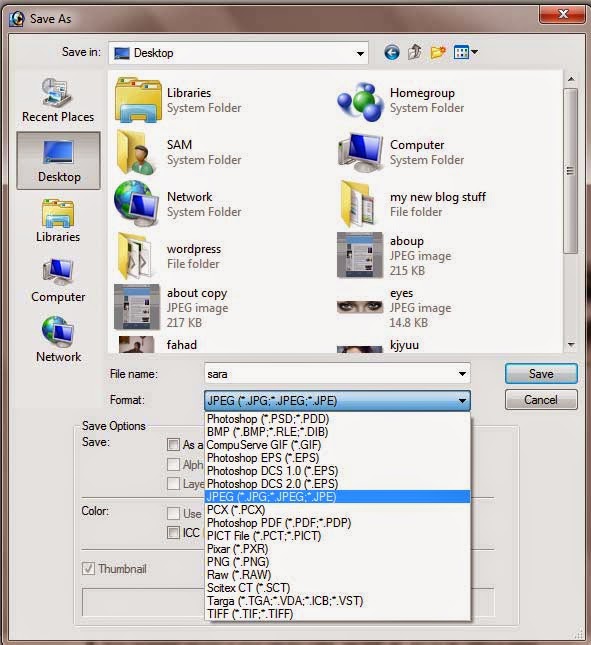 |
| Save As: Save image in any format other than PSD |
I typed the name of my friend's newly edited image in the
file name box
then selected the format
jpeg out of the format
drop down menu and clicked the button
save .One by one, I edited all the pictures by the same method and everyone liked them.
I hope my readers will find this post helpful and interesting at the same time. If you want to put forward any objection or suggestion regarding further improvement, kindly don't forget to subscribe your comments.


0 comments:
Post a Comment